Network inventory systems provide nearly instant access to in-depth information about your network. They let you use the full potential of these data and improve operations across many departments in your company. However, purchasing and implementing a network inventory system is only the first step. To fully leverage your system, you need quality, up-to-date information.
This is why it’s crucial to efficiently load your data into the system and maintain them up-to-date. Then how can you quickly import data into your inventory system so you can start using it immediately? Read on to find out!
3 ways to efficiently import data into a network inventory system
When you implement a chosen network inventory system and collect your data, there is a third step for you to take – data migration. How can you load information into your inventory system?
You have 3 options:
- Manually model your network in the inventory system.
- Import data using built-in loaders.
- Import data into the system’s database using SQL scripts.
Built-in loaders – importing data into the NetStork inventory system
NetStork was equipped with in-built loaders. They can be used to import address data, network geometry, inventoried objects with their attributes, as well as connections between these network elements.
How can different data formats be imported into the NetStork system?

1. DWG/DXF data import
If you own project documentation prepared in AutoCAD, files are in the DWG or DXF format. You can connect such documents as a network base map or import the network into the NetStork program. Data from DWG/DXF that you can import into NetStork may include…
- network nodes
- or network nodes and parts of the network between the nodes
How can you import data from CAD files step by step?
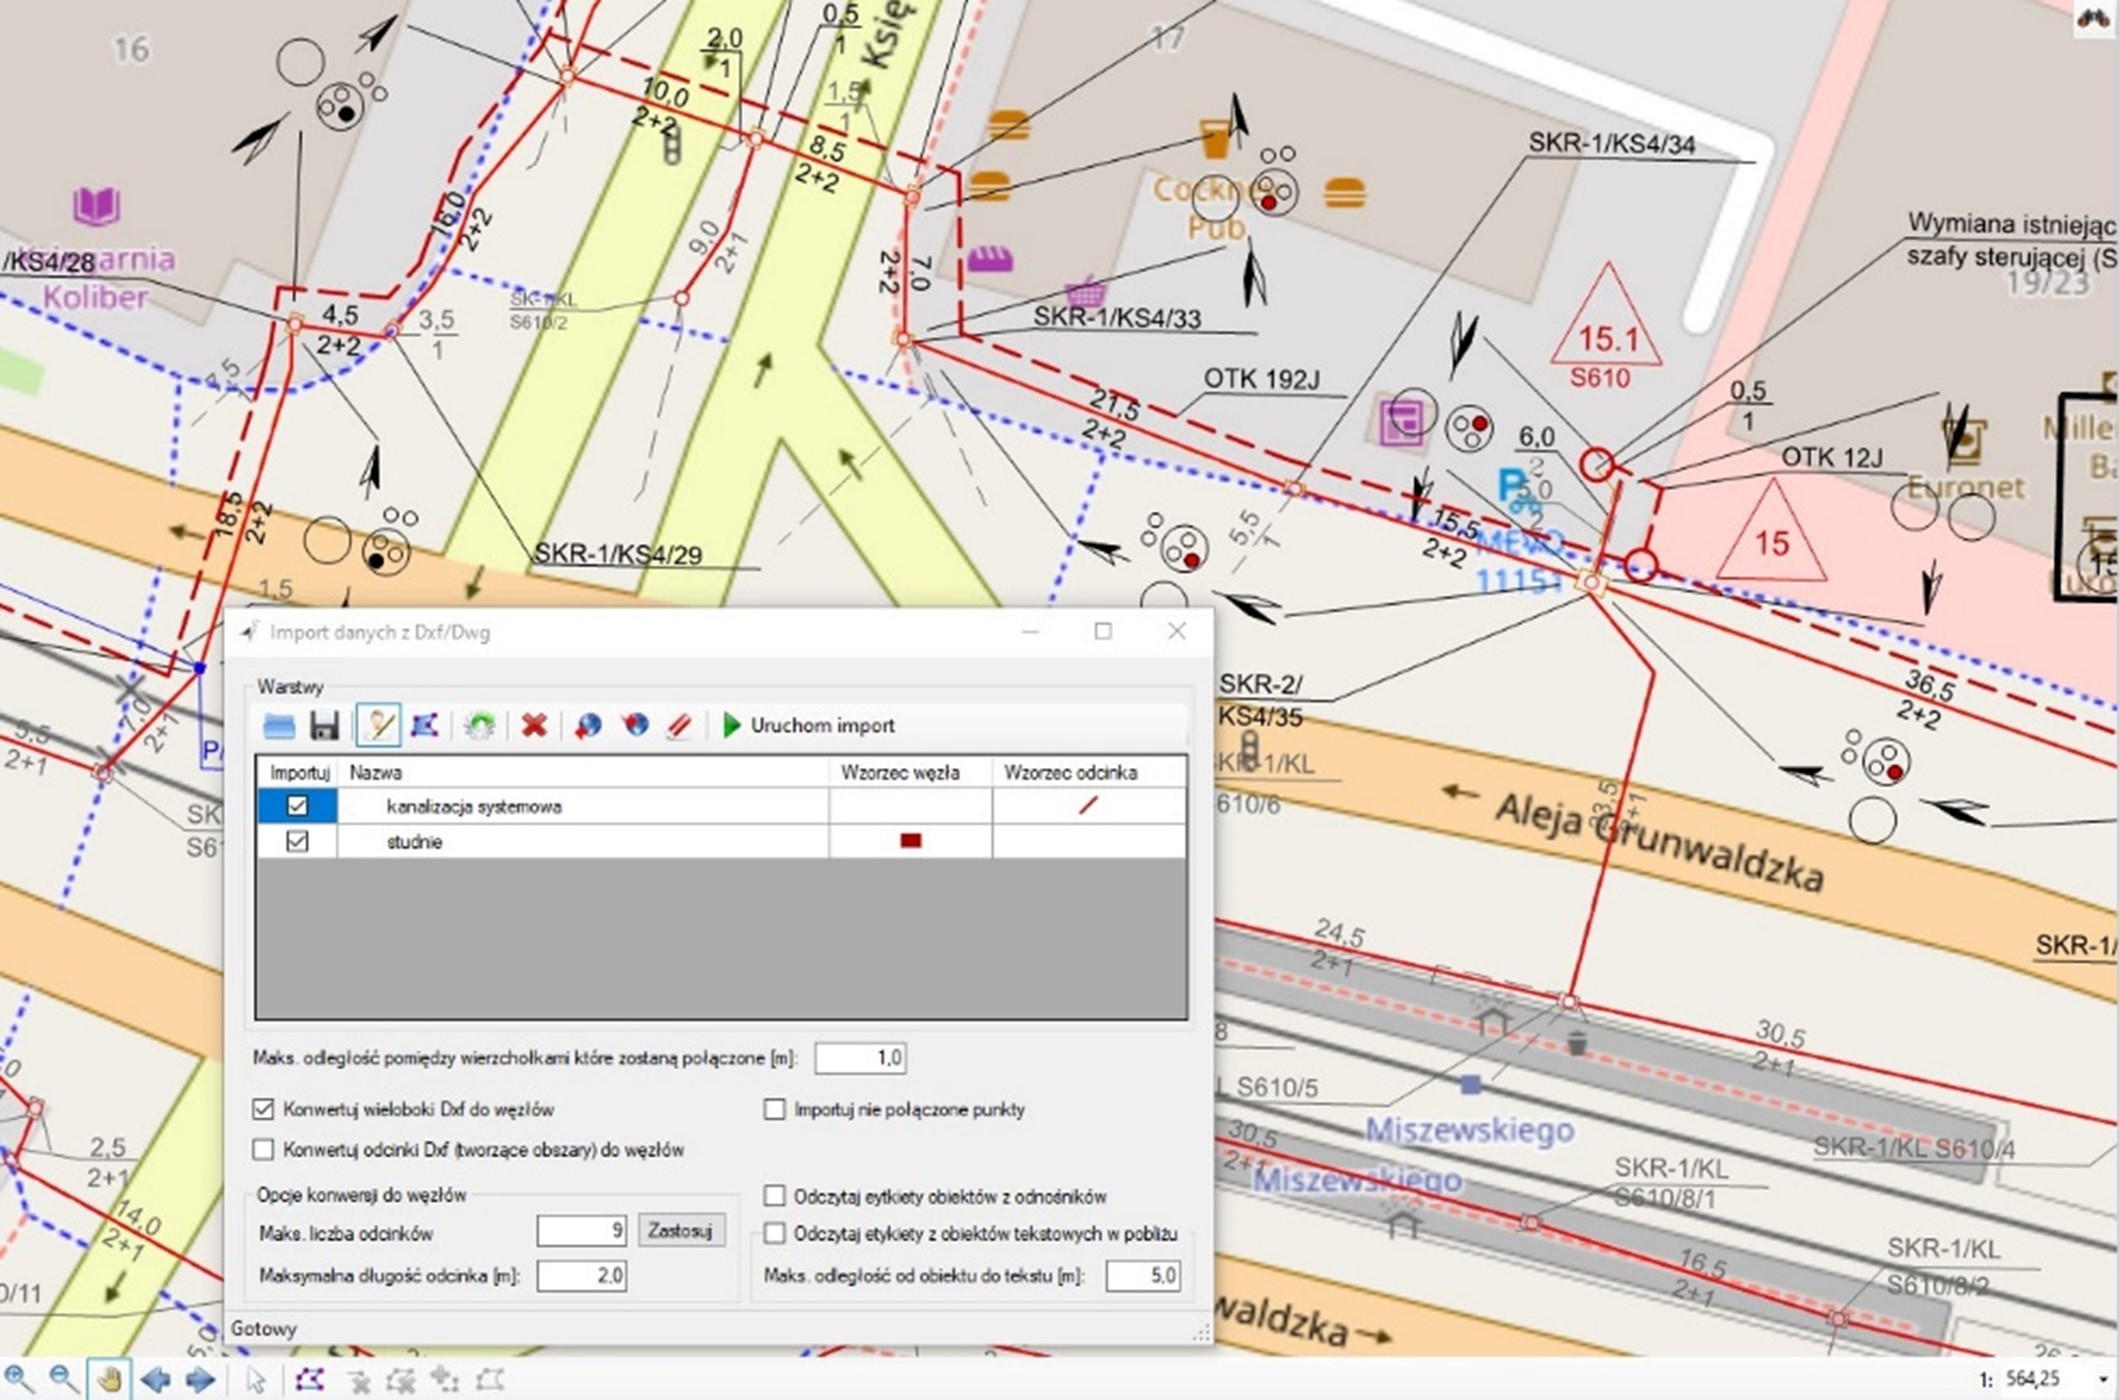
To transform graphic data from an AutoCAD file into inventory objects in NetStork, you need to complete a few simple steps:
- Attach DWG/DXF file to make it visible in the right spot on a map.
- Specify a node on the DWG/DXF base (the program automatically recognizes all remaining nodes in each layer).
- Assign a pattern, e.g., a manhole, pole, building, or case, to the chosen node or multiple nodes.
- And finally, launch the import.
This process looks similar in the case of the layer containing network fragments.
4 simple steps to import CAD-type files (DWG/DXF) into NetStork.
This way, you can import network geometry, including nodes and network fragments, into NetStork. Complete four simple steps to transform graphic objects into inventory objects.
Your entire network geometry presented on a map was migrated. The newly created objects have the same attributes as the pattern (e.g., manhole, pole, or others). If it’s needed, all you have left to do is add the unique attributes for each node or network fragment.
The described method allows you to automatically import the vast network geometry into an inventory system without manually modeling it on a map.
2. Address data import
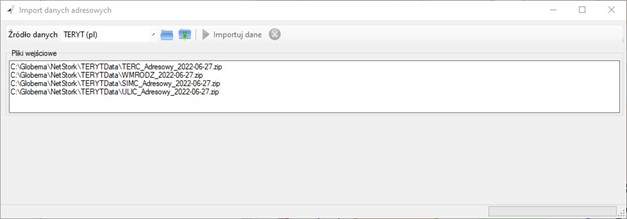
To model your network and create adequate reports (such as reports to the Office of Electronic Communications – UKE), you also need to import address data related to the network. In Poland, such data should comply with TERYT (National Official Registry of Territorial Country Division) or PRG (National Border Registry). The TEYRT database provides street names for addresses. The PRG database has better accuracy, as it contains the exact address points and not only street names.
The NetStork system automatically imports data from files available in both TERYT and PRG resources.
With NetStork, you can import address data available in TERYT and PRG registries
3. CSV data import
You may need to import the entire network, including its internal structure. In such a case, it’s best to prepare data in a tabular form (e.g., in Excel) and save them in CSV format. This ensures that network objects include all attributes or at least the most important ones.
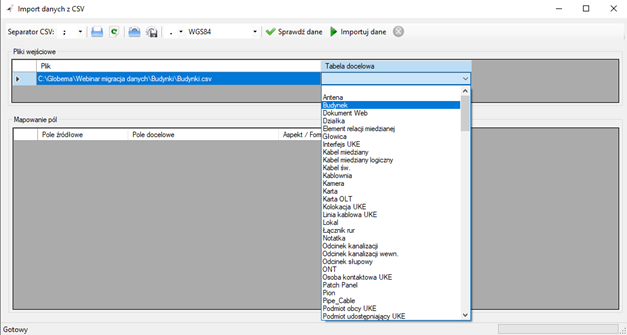
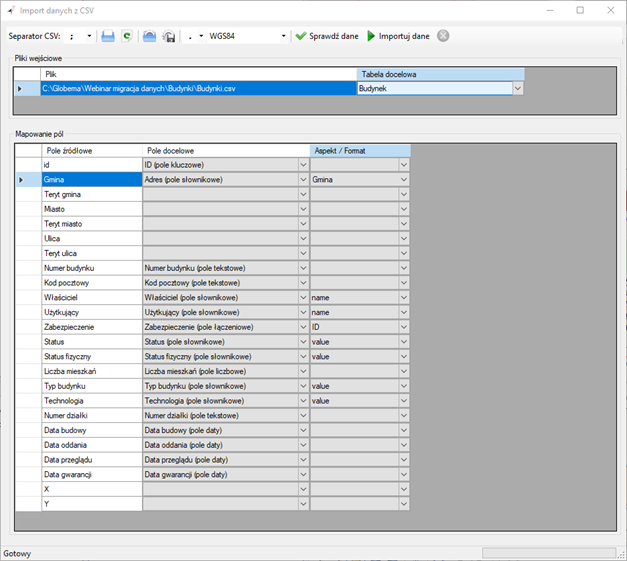
For example, you should map data from particular columns in the file onto specific attributes of the “Building” object to import information about buildings.
Mapping is performed in the data table view and the attribute table of the chosen object in NetStork. None of this requires programming skills or knowledge related to the data structure. You only have to specify a column with data in the source file and the corresponding column in NetStork.
After mapping is finished, NetStork verifies and imports data. You can repeat this process for any other dataset or a larger quantity of files.
Import of CSV data related to the “Building” object
CSV data import – mapping data related to the “Building” object
Summary
If you own data in a digital form, data loaders help you promptly import network data into the NetStork program. Loaders save the time needed for data import and let you avoid common mistakes related to manual network modeling. With all this, you can quickly start to use your inventory system.
With in-built data loaders, you can import data from both files and other inventory systems into NetStork.
Would you like to learn more about migrating data into the NetStork inventory system? Contact us!


